Basic Survival Skills

When someone requires help or when you are in a self-rescue situation, put to use basic survival practices and tilt the odds in your favor. Knowledge about CPR, use of AED, stanching bleeding with tourniquet, Heimlich maneuver, access to a home or car first aid kit can truly be valuable in a survival scenario.
Why know basic survival?
There are likely to be situations when you have to help yourself and if possible, others around you. From deep wounds causing excessive bleeding, sudden cardiac arrest to a hurricane, tornado, earthquake, political unrest or even a chemical manufacturing factory spewing poisonous gas, anything can happen anytime for anyone. The present comfort zone can turn topsy-turvy. Awareness about basic survival instills confidence and equips you with practices to help yourself and anyone who looks up to you for survival.
Break the ice
Civilization has changed. Mankind has undergone changes and evolved with time. Yet, the defending traits of our primitive ancestors who lead life in the wild are embedded in all of us. We have to partially awake the basic defense skills and combine it with acquiring knowledge about basic survival practices. One doesn't require great strength or intelligence but presence of mind and basic survival practices could save a person's life.
Power of mind
The key to getting equipped with basic survival practices is preparing your mind to positivity. Research studies stress on how positive attitude can provide the mental endurance to stay safe in a given situation. So, prepare the mind to tackle the situation so as to survive. Feel confident and be willing to act.
Group vs. individual learning
Survival means a lot to different people. Joining a group has many advantages. Each member brings a broad background of experience. You are exposed to varied experiences, an array of talent. Importantly, group learning helps in overcoming fears far better. Also, being in a group makes learning easier with some fun element attached to it. There is a moderate amount of anxiety or challenge amongst group members that motivates participation.
Answer to dilemma
To practice basic survival skills one doesn't need to be a health care provider or a professional rescuer. Good Samaritan laws provide legal protection for those who provide first aid in good faith sans any compensation.
Invest in quality
From basic to advanced, there are different basic survival courses. Trainers equip trainees with self-reliance skills through practical exercises as well as classroom type training. Weekend classes are most suitable for working adults, college and school students. As survival training is an investment of your time and money engage in small exercise.
- Look for a group with a small ratio of instructor to students
- Ask for instructor's resume
- Verify credibility of center and instructor
- Verify the authenticity of years of existence of training center
- Visit and converse with those training
- Choose a region that makes commuting easier
- For primitive living skills train in same geographic region
- Choose full-time vs. part-time instructor
- Know more about on-the field training/outdoor training
- To gain priceless skills, don't bargain on course fees.
Basic survival practices
Here is a list of basic survival practices. Gain insight into why and when each of these can be used. Follow it up with a class for hands-on training. In order to be prepared to help others during an actual emergency, you need to practice each of these skills duly checked by a certified person. Post an instructor-led practice session an online CPR simulator can be useful.
Learn CPR: Cardiopulmonary resuscitation (CPR) lays emphasis on treatment of sudden cardiac arrest. The therapy is aimed at reviving a victim of cardiac arrest. If CPR is started before emergency help arrives, the patient has a much greater chance of surviving. CPR keeps the heart pumping and the oxygen flowing until emergency care arrives.
The procedure enables squeezing the heart between the breastbone and the backbone to force blood out. When the chest is compressed, positive pressure manifests inside the chest which pushes oxygenated blood out of the heart through the aorta. It then travels to the brain and then to the other parts of the body, delivering oxygen for cellular respiration.
Step-by-step guide to doing CPR
- Determine unresponsiveness - tap the victim and shout, are you ok?
- Check for breathing.
- See if the chest rises
- Listen and feel for air coming from the person's mouth or nose
- Activate the emergency response system(or phone 911)
- Return to the victim
- If the victim is with dentures check if it is positioned properly
- Take the right position, preferably flat on the floor
- Position hands on the center of the chest (midway between the nipples)
- Tilt the head back and lift the chin up
- Pinch nose and cover the mouth with yours
- Take a deep breath
- Exhale into the patient's mouth
- Check for the rise and fall of the patient's chest
- Give two breaths. Each breath should take one second
- Continue with 30 pumps and 2 breaths till help arrives.
Note: If the victim is a baby, substitute hands with two fingers to compress the middle of the chest. Be less aggressive with the compressions. Try to complete at least 100 in one minute, same as with an adult.
About AED: Automated external defibrillator (AED) is a portable electronic device. AED performs dual job that of diagnosing symptoms of an irregular heartbeat and treatment through defibrillation. A successful AED allows the heart to re-establish its rhythm to normal. Local supermarket, shopping mall and amusement parks, almost all public places are equipped with AED.
Data indicates that 85% of cardiac arrests happen at work, homes and in public places. If an AED is accessible and used within the first five minutes, chances of survival is rated as 75%. Beginning January 1, 2014, in Manitoba, Canada, the Provincial government requires anyone with AED to register with the Heart and Stroke Foundation. This facilitates locating a nearby operational AED by the emergency medical services.
The American Heart Association strongly encourages companies and organizations to implement AED programs. School students are also encouraged to learn AED. Participants in AED program are prepared to save the life of a coworker, friend, family member or a stranger.
Besides adults, AED can be used in children older than 8 years. AED is not contraindicated for use in pregnant woman.
Buying AED
Buy a FDA approved AED. There are different models and designs. Of the two types, namely, Public Access defibrillators (PAD) and First responder/manual mode defibrillators, the former is suitable for use by untrained individuals and is categorized as ‘home use AED'. Check if the instructions are clear so that the goal of delivering within three to five minutes after collapse can be achieved.
Using AED
Using AED is simple. The portable version requires the user to turn the AED and follow the audio instructions when prompted. The step-by-step voice prompts explain the steps to take to administer not just AED but CPR as well.
Stanching bleeding
Razor cut, paper cut, wounds as a result of getting hurt, scalped knee etc. bleeding can occur. Excessive blood loss is harmful and can result in loss of life. Loss of a liter of blood can cause symptoms of mild shock in a person. Loss of 3 liters can cost losing life. Stanching bleeding is to stop bleeding.
Follow these steps to staunch bleeding until help arrives.
- Make the person lie down
- Raise the wounded area so that it is above the level of the heart
- Apply pressure on the cut or wound using either gauze, clean cloth, dried seaweed or a sanitary napkin
- Hold the pressure for 20-30 minutes
- Do not check if blood has stopped from time to time
- If bleeding continues use a tourniquet above the wound so that the supply of blood from the heart is regulated.
- Let not the tourniquet be too tight as it can cut the blood circulation to that part of the body totally.
- Do not remove any foreign body that is embedded in the wound as bleeding can start all over again
- After the bleeding has stopped attempt to clean the wound
- Rinse with cold water
- To clean the area around the wound use soap and a wash cloth
- Apply an antibiotic cream or ointment such as Neosporin or polysporin to keep the surface moist
- Cover the wound
- Bandage the wound to keep wound clean and away from bacterial infection.
Stanching nose bleeding
- To stop nose bleeding let the person sit or stand upright
- Pinch the nose using index finger or thumb
- Continue pinching for 5-10 minutes or until bleeding has stopped
- Let the person breathe through the mouth
- If the bleeding doesn't stop seek medical help.
Note: Wash your hands both before giving first aid and after dressing the wound.
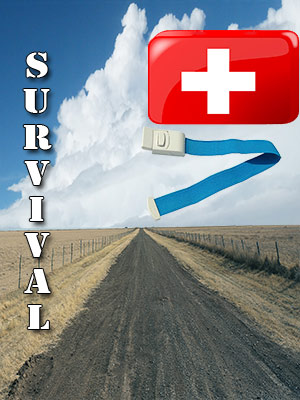
Stanching bleeding with tourniquets
You don't need a medical tourniquet to save a life. The texture ought to be soft and (not mushy) the width preferably 1 to 2 inches wide. Even a belt, laces on shoes, long sleeve shirt, bicycle inner tube, strap etc can be substituted for a tourniquet. Though its primary use is to control excessive bleeding, tourniquets if used correctly will increase the size of a vein considerably.
But, tourniquets aren't the first choice for stanching bleeding of a wounded (or broken and torn) leg or arm of a person. Reason being tourniquets can damage nerves and blood flow. It's only when bleeding cannot be stanched with excessive pressure using bandages or gauze, clean cloth etc. tourniquets are used. When all other ways have failed and is absolutely essential, make use of tourniquets to staunch bleeding. With proper training and application tourniquets can be one of the most effective life saving device for basic survival. Here is a guide to using tourniquets for basic survival.
- Tie the tourniquet just above the wounded arm or leg.
- Tie it tight enough to stop blood flow in the affected part
- Apply tourniquets for a maximum of 1-2 minutes
- If prolonged it can lead to blood pooling at the venipuncture site.
Insect bites
To experience painful, itching insect bites, one doesn't need to be in the wilderness. A walk in the garden or a visit to your backyard, insect bites can take place anywhere. The most common signs of insect bite are the skin turning red, swollen, and itchy. Insect bites can be painful too.
Most reactions to insect bites wane away in a day or two. Off the lot, bee, wasp stings and fire ant bites can hurt us. Mosquito, flea and mite bites result in itching. Furthermore, insect bites can spread Lyme disease transmitted by ticks and malaria that is transmitted by mosquitoes.
Insect bites - Precautionary measures
In situations where there is a high possibility of being bit or stung by insects, avoid insect bites by taking basic precautionary measures.
- Wear long sleeves
- Prefer pants to shorts
- Never walk barefoot
- Avoid highly populated insect areas and nests
Dealing with insect bites
In most cases the pain and swelling that is common with insect bites can be contained by doing simple things such as:
- Wash the affected area with soap and water.
- Place a cold compress (ex: a cloth soaked in cold water) over the area to reduce inflammation and ease the pain.
- Avoid scratching the affected area as it can aggravate infection.
- If painful or the area is swollen, take painkillers such as Paracetamol or ibuprofen.
- If you can locate the bee sting left in the skin scrape it out as quickly as possible using the edge of a knife, the tip of fingernail etc.
- Never grab the bee sting left on the skin as it may lead to excessive squeezing of venom into the skin.
Persistent itching
The itchiness associated with insect bites is likely to fade away soon. However, if it persists for hours or recurs after a day or two here is what you can do.
- Rub crotamiton (anti-itching drug) ointment on to the itchy skin. This ointment can be obtained over the counter sans a prescription from health care provider.
- Contact your health care provider who may prescribe hydrocortisone, a strong steroid cream.
- If persistent itching interferes with night sleep, use antihistamine tablets.
Finally, if the signs of insect bites aggravate, contact your health care provider who in turn may prescribe other medication or may refer you to an allergy clinic for immunotherapy.
Life saving Heimlich maneuver
Choking is a life threatening situation. Heimlich maneuver is a basic survival procedure to save a life by helping the person chuck out any obstructing object lodged in the airway that is causing the person choke. Also referred to as abdominal thrusts, Heimlich maneuver is a basic survival practice that can be practiced on oneself as well as on others. One needs to remember not to give up if the first attempt is a failure. On a second or third attempt, the obstructing object is likely to be expelled. Use the step-by-step guide to administering Heimlich maneuver.
Signs of choking
Sometimes it can be misleading. To differentiate between other conditions such as a stroke or a heart attack which can cause a person to experience difficulty breathing and a blocked airway leading to choking, use these vital indicators.
- The face turning blue due to lack of oxygen supply.
- Inability to cough forcefully.
- Unable to speak or not able to speak at all.
- Trouble breathing.
- Wheezing or a whistling sound while breathing.
- Victim instantly grabbing the throat.
Ask crucial questions
Remember, Heimlich maneuver can be given to a choking person who is conscious.
- ‘Are you choking? The person should nod indicating ‘YES'.
- Then, ask ‘can you speak'?
If yes:
If the answer is in the affirmative, this means the airways is only partly blocked. If so, Heimlich maneuver is not appropriate. Just encourage the person to continue breathing and cough forcefully so as to remove the object stuck in the airway. In all possibility, the person might begin to vomit to cough out the object.
If no:
If the person cannot speak, call 911 for help. In the meantime, you need to act quickly. Your target should be to expel the obstruction before the person loses consciousness. Do the Heimlich maneuver till help arrives.
Doing Heimlich maneuver on yourself
- Get a chair, table or counter over which you can bend over
- Bring together all fingers and make fist
- Place below your rib cage and above your navel
- Hold the fist with the other hand
- Bend over the chair, table or counter over which you are bending over
- Support your fist on the chair
- Press forcefully enough into it so that the thrust dislodges the object.
Doing Heimlich maneuver for an adult
- Stand behind the person.
- Form a fist with one hand.
- Place the fist, thumb side in.
- Check position is below the person's rib cage.
- Grab the fist with the other hand.
- Keep your arms off the person's rib cage.
- Give four quick inward and upward thrusts.
- Repeat several times till the obstructing object is coughed out.
Doing Heimlich maneuver in children
Follow the same procedure as with adults. But exercise caution with the amount of force used which ought to be less than that used with adults to avoid damaging the child's ribs, breastbone and internal organs.
Doing Heimlich maneuver in infants
- Sit down.
- lay the infant along his or her forearm (face pointed towards the floor).
- Provide hand support to the infant's head.
- Use the heel of the other hand to administer four or five rapid blows to the infant's back.
- Turn the infant over so that the infant is lying face up.
- Place the index and middle finger on the center of the breastbone and make four sharp chest thrusts.
- Alternate the back blows and chest thrusts until the object blocking the airway is expelled.
Special attention to two groups
There is a slight difference in doing Heimlich maneuver on pregnant women and very obese people. It is the placement of the fist. Instead of using abdominal thrusts, use chest thrusts like that in infants. Place the fist against the middle of the breastbone and the motion of the chest thrust should be downward rather than upward.
Contents of a home first aid kit
The American Red Cross suggests that everyone should have a first aid kit in the home and in the car. What are the stock supplies that can save lives?
Minor cuts, scrapes, burns, abrasions, sprains, stings and strain, an unexpected injury can happen anytime which explains the need for a well-stocked first aid kit. If you opt for a ready-made first aid kit, it may have items that you will not use or include pills or ointments that are close to expiry date. It's best to choose and include the following items that are easily available in the nearest drugstore. After assembling the items pick a right size box and store it in a dry place, preferably in a centrally accessible place along with a first aid kit manual.
Every time after using a particular item, remember to replenish the stock from time to time. Also check expiry date from time to time. Place the kit in an easily accessible place.
Adhesive bandages
Used to ensure cuts and wounds are covered. These bandages come in two sizes. Larger ones for bigger cuts and smaller ones for shaving cuts and smaller scrape.
Antiseptic creams and lotions
A good antiseptic lotion is required to rinse a wound and free it of any debris or particles that can lead to infection. Each time you dress the wound, an antiseptic will be required.
Ex: Dettol or Savlon.
Muscle creams and sprays
Sprain or a backache is a common ailment. Instead of rushing to the pharmacy find instant relief by picking a muscle relaxant spray from your stocked first aid kit.
Tweezers
Use it remove debris such as glass, dirt or splinters from a wound or even to remove stingers left behind by bees. Sterilize it with antiseptic lotion before and after use.
Sterilize gauze and tape
A band-aid is too small to cover bigger injuries. Keep an assortment of gauze pads. Use it to absorb blood or create padding. Apply antiseptic cream and then cover the wound with a tape.
Pain relievers
Combiflam, ibuprofen or a Paracetamol is a must-have in a first aid kit in a home. Even an unbearable ache and pain can be managed with pain killers till you seek medical attention.
Antihistamines
Antihistamines are used to treat mild allergies which can be triggered by pollen, pet dander, ragweed, dust mites etc. When the body comes in contact with these triggers a chemical reaction takes place, called histamines. Antihistamines reduce or block histamines and stop the allergy symptoms. Some antihistamines work for 4-6 hours and some last for 12-24 hours. It's best to discuss with your health care provider before stocking OTC or even prescription based antihistamines in your home first aid kit.
Fungal medicines
Fungal infections are most common in the skin, nail, mouth and vagina. Talk to your health care provider and discuss any existing conditions or allergies that may affect you and others in the family. Stock fungal medicines as directed by your health care provider.
Thermometer
Mercury thermometer is outdated. A digital thermometer is a must-have in a home first aid kit.
Instant cold-pack
Bruises, cuts and burns can cause pain. Instant ice packs in a home first aid kit not only ease pain but also ease heat. Disposable cold packs are available to suit varied first aid kits. Choose packs that are ideal for children and adults with sensitive skin. CPR face shield or pocket mask.
Others
Try and include cotton balls, plastic bags for the disposal of contaminated materials, bandage scissors and tweezers, soap or instant sanitizer, syringe, medicine cup or spoon safety pins in assorted sizes. Medications such as anti-diarrhea medicine, cream or spray to relieve insect bites and stings, disposable sterile gloves, cough medicine can be part of your home first aid kit. Emergency items such as a torch, candle with a lighter, barrier device for CPR, emergency blanket, medical history of each family member, emergency phone numbers, contact number of your health care provider, emergency service providers, sunscreen etc
Contents of first aid kit in automobile
Well, you have smartly tucked in your home first aid kit while travelling in an automobile. The other option is to buy a handy travel first aid kit. Do include a cell phone with a dashboard-compatible recharger. Now the contents are appropriate as that of a first aid kit in automobile. You are fully prepared to access emergency medical services if an emergency situation arises. Do not use a de-activated cellular phone. While buying a new cell phone check with your cell phone carrier to verify if your phone has the capabilities to deliver the 911 location of the phone.
In this context, be aware of a rule of FCC (Federal Communications Commission)
FCC's basic 911 rule:
The FCC's basic 911 rule require wireless service providers to transmit all 911 calls to a PSAP (Public safety answering point), regardless of whether the caller subscribes to the provider's service or not.
Top of the Page: Basic Survival Skills
Tags:#Basic Survival Skills
 Recreation Ideas
 Needle Crafts
Hobbies - Recreation
Chinese Painting
Travel Accessory
Travel Packing Tip
Basic Survival Skills
Outdoor Survival Skills
Survival Kits
Travel Recreation
Scuba Diving Vacation
Stained Glass Art
Candle Making Tip
Staycation Ideas
Top of the Page: Basic Survival Skills
Popularity Index: 101,056